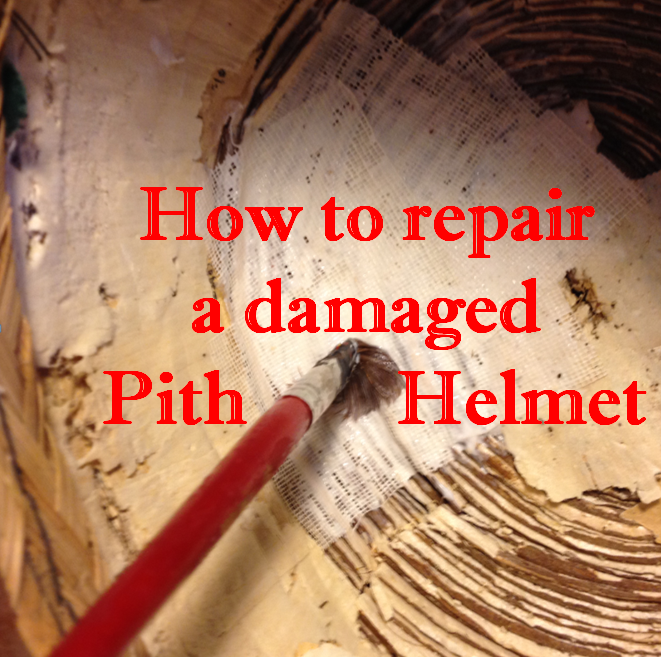
The collapse of the very top of the dome is a common “disease” amongst sun helmets made from that light material, pith. In this respect, it does not matter, if a particular helmet had had an adventurous life or was never taken out of his transport tin. The damage described above is often due to a weak point in the construction. This article shows a way to repair or at least stabilize a damaged helmet – before it gets completely “puzzled” – by using techniques borrowed from bookbinding.
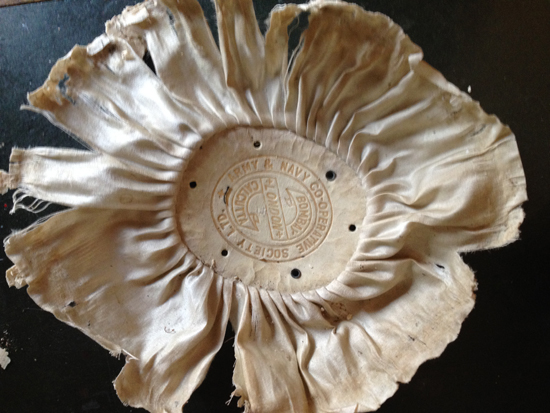
I will not start to write anything about quilted cloth covered Cawnpore Tent Club pith helmets at this occasion – just that I like that kind of sun helmet most. So, whenever I came across one in a damaged condition, I thought about how it could be possible to repair it. I made some experiments with the remains of one, a complete wreck, concerning glues, fabrics etc. That way I developed the idea that I first executed on a helmet bearing the label of a merchant in Risalpur Cantt (Cantonment), then for the result, in my opinion, was quite satisfying, with another example of the same kind, once being sold at the Army & Navy Stores – that being the one without the multifold puggaree. Both date, in my opinion, from the 20s to 40s. The following description will mix pictures of both cases.
Step 1:
Find a bowl that is large enough to allow the brim to rest, but does not touch the dome. Alternatively, one may as well work with the brim resting on one´s legs. Anyway – avoid the helmet to rest on its top. (Important to avoid surprises: try to find out before you start to work if that very bowl or pot is urgently needed at dinner time).
 Step 2:
Bend the leather of the liner towards the bottom of the helmet. Before, make sure, that the leather is still in a condition to be bent. If it is very dry and tends to crack, a treatment with some grease or leather care product is advisable.
Step 3:
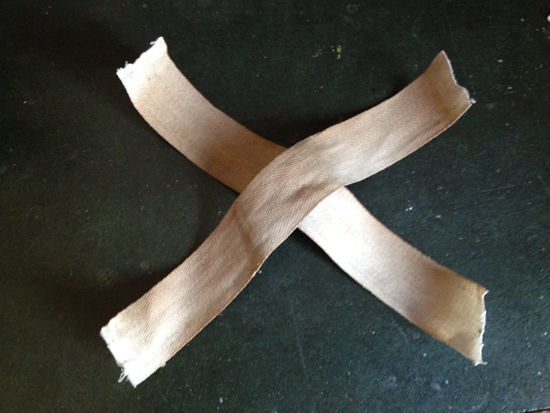
Hessian cloth straps are typical for pith helmets of that period. They have to be removed. Do not pull them out – a large piece of pith might come with them! It is better to cut one end or both with a sharp knife. Leave some millimeters to glue it back onto, later.
 Step 4:
Remove the label and the silk inlay. Usually, the silk is glued to the inside all around the label and all around or at some spots to the inside of the corpus, shortly above the liner, usually hidden by the leather. Be careful! The same as for the straps applies here. Never pull violently. Take the edge of the silk with a pair of tweezers, hold a finger on the pith just beside it and pull slowly – again, pieces of pith might otherwise come with the silk.
Step 5:
When the silk is loose all around take the label out. Usually, it is glued to the fabric only on few spots – for it often has ventilation holes. Sometimes it is not fixed at all. But careful: Under the label is the weakest point of the whole pith helmet construction!
 Step 6:
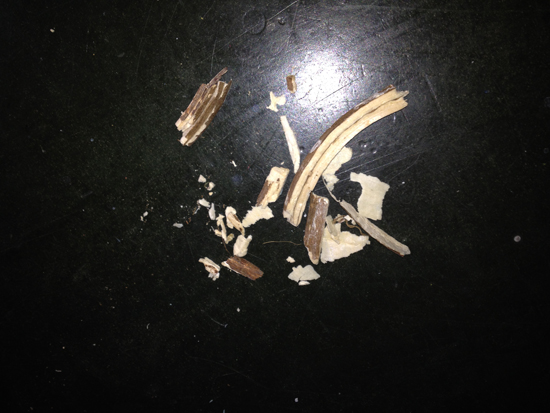
In one case, some pieces of pith were already loose under the silk. Collect everything you find carefully!
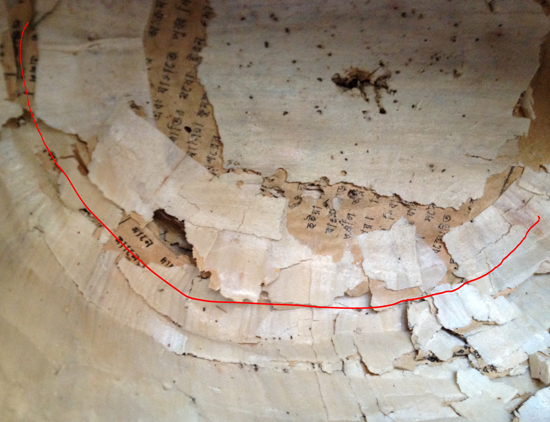
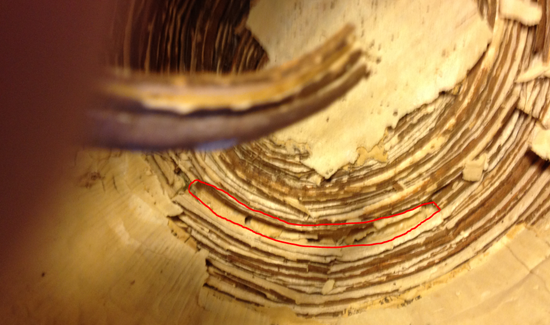
 Now we can inspect the structure of the helmet. As well, we get an explanation, why pith helmets tend to break always at the same place. The top might be completely flat or slightly rounded: The weak spot is at the edge of the oval plane, where a structure using some layers of pith changes to a structure with only a single one. The firmness was secured only by pasting layers of paper on the pith – usually waste paper like that from old newspapers. If a helmet had collapsed, it is usually at this spot, where the waste paper broke – due to its bad quality. See the red line on the picture.
 Step 7:
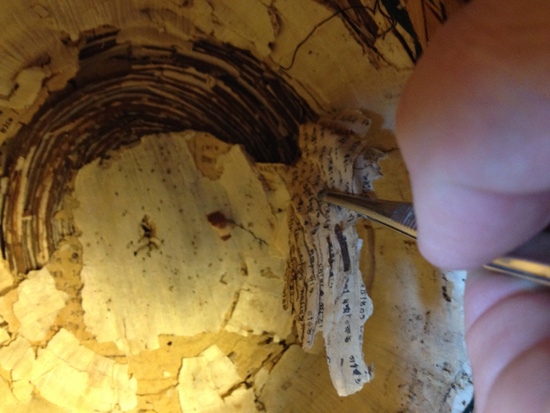
That waste paper has to be removed wherever it is lose or broken. Again we use a pair of tweezers. Usually, it nearly comes off by itself – but nevertheless be careful not to produce a pith-puzzle by pulling off too large pieces! Patience is essential!
 Step 8:
The large oval has stayed mostly intact. We start by fixing the large missing piece using instant adhesive. Than we carefully press the oval into its original position with only the slight pressure of a finger. During that, we hold the whole helmet in the palm of the other hand.
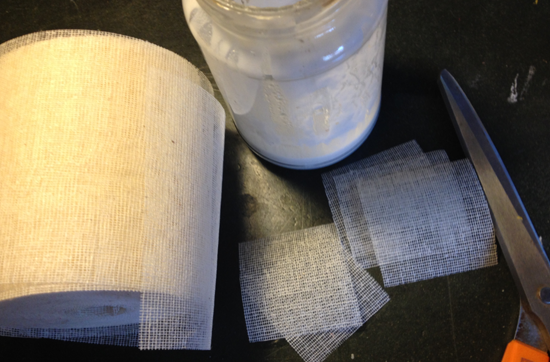
 Now, a bookbinder uses different pastes and glues – a paste for example for a cover paper. The same kind of paste would be used for a wall paper – or was used for the layer of wastepaper in the helmet. But when the bookbinder fixes gauze to the spot, where the plies of paper are stapled, he uses, instead of that paste, a kind of strong, but still flexible glue. That glue would help holding the plies together, but still allow the book to open properly. That combination of firmness and flexibility seemed to me the ideal solution for a helmet. The next steps will show why. In Germany, one brand for that kind of glue is for example “Planatol BB”. Readers in other countries will not have difficulties to find an equivalent.
 Step 9:
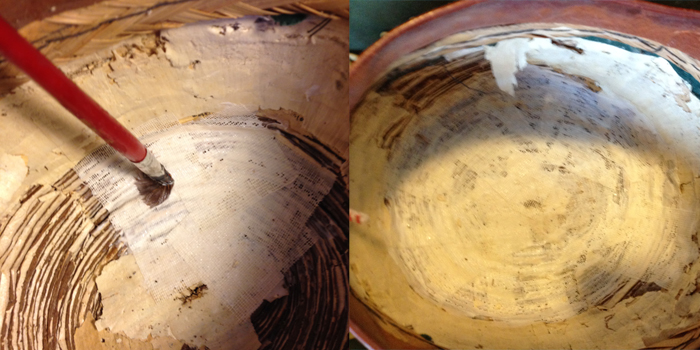
Small pieces of gauze are now glued directly on to the pith: All around the edge, where the dome bends, after that, below that and finally all over the oval plane. If necessary, the whole inside of the helmet may be fixed like the imbrication on a roof. Important: the gauze is not just glued on top of the pith – it has to be inwrought, maybe by giving slight pressure with the brush or by using a bookbinder´s folding leg. When this is completed, the helmet can rest in the salad bowl.
 Step 10:
We observe the white glue, until the decisive moment of the operation has come: That is when the once white glue has nearly changed into no color at all and does only very slightly sticks to the finger. Depending on the outside or room temperature, that will usually be the case within a few hours. Do not miss that point! For now we again take the helmet into the bowl of one hand and press the gauze-saved pith carefully and slowly into the right position. It will remain in that position and when the glue is completely hardened – our helmet should appear in his beautiful old, but now tightly secured shape! Pasted paper would not have allowed that flexibility. Now, fix back the label and silk again. Usually, a small spot of glue under the label is sufficient, for the silk holds behind the now again folded up leather liner.
Step 11:
Hand back the salad bowl to its lawful owner.

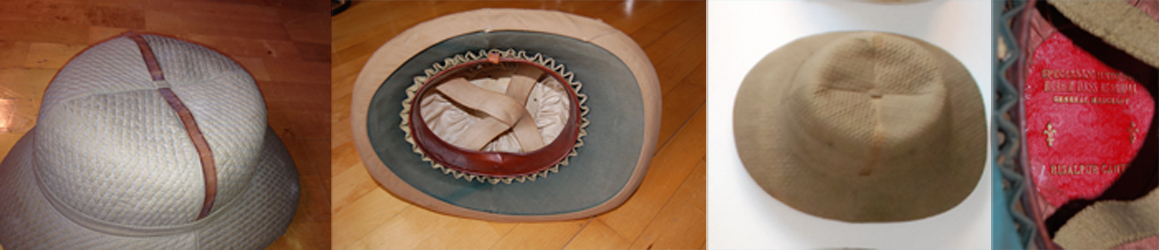
Before and after – Though the damage is better visible on the right hand side, both helmets were completely cracked.
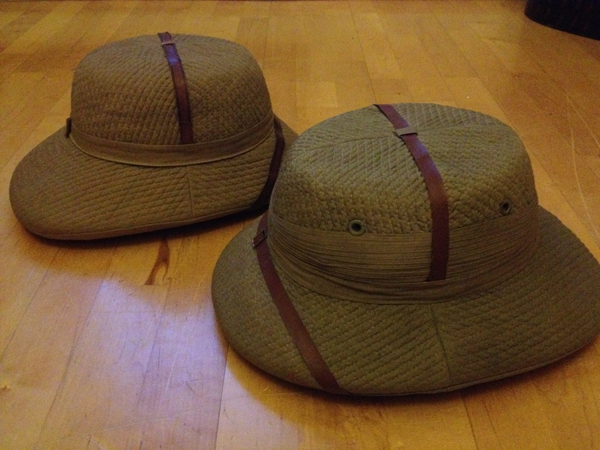
Instead of being sunken in, the tops of both helmets’ domes are now straight again. A replacement of missing leather straps was the final step.
Roland Gruschka
I have a pith helmet but the inside adjustable band is broken. I’m looking to replace the band with a completely new one. Any suggestions as to where I can find a pith helmet adjustable band that goes on the inside?
In my experience very difficult to source, although I know that Christy’s UK do make pith helmets for military/ceremonial use so they may be able to assist (although you may have to buy in wholesale quantities! ) One restoration method I have seen used is to recreate the liner using Chamois leather (available from the likes of Halfords) . For a typical liner for a 60cm head size you will need a 6 inch wide strip of chamois, fold in half and carefully PVC glue together (so the band is now a double thickness 3 inches wide) .Make the drawstring holes ( using a 1/4 inch chisel ) and attach to an inch wide cardboard liner band (also 60 cm circumference). PVC glue the assembled liner into the helmet using 4 cork or leather spacers /fixing points if necessary . You can also use split pins if say, a pugaree covers the outside.Threadle the drawstring through the holes and job complete. Carefully done the finished result looks really good!
Is it any pith repair hat in US where I can have my hat overhaul,,,need new head band,cleaning,,,I would like to keep it,,,was my first pith hat
Could you.help me WITH. Information as to where i could call.or Send it???.I would appreciate any assistance. Thanks, Ron
Hi! Wondering if you found anyone to repair your hat? I am also looking for someone to do a repair. Thanks
I have just bought a helmet, how do I fix up the holes where badges have been?
I have an unissued kriegsmarine pith helmet that had the top of the dome crushed. Is there anyone who is capable of such a repair. This would require removing glued cloth and pressed aluminum vent parts. It is such a shame to see a rare helmet in a new looking condition with the top crushed.
Hi, I have a second pattern DAK pith helmet, for its age is in excellent condition throughout except for the green leather around the brim. Is it advisable to replace this? the leather is very brittle especially to the front half where some of the reinforcing wire is exposed. Would replacing this leather add or distract from the value of this helmet?